tf-explain is a pip installable library which is completely built over tensorflow 2.0 and is used with tf.keras. It helps in better understanding of our model that is currently training. In tf.keras we use all of it’s apis in the callbacks that is provided to the model while training.
Definitely, tf-explain is not the official product of tensorflow but it is completely build over tensorflow 2.0. One of it’s main advantage is the usage of tensorboard that provides us information related to the images with a better view and clear graphics.
The entire code is present at https://github.com/AshishGusain17/Grad-CAM-implementation/blob/master/tf_explain_methods.ipynb . The implementation of various methods over the images can be seen below with graphics.
Installation:
pip install tf-explain
pip install tensorflow==2.1.0
Usage of their API’s:
1.) Build a tf.keras modelimg_input = tf.keras.Input((28,28,1))
x = tf.keras.layers.Conv2D(filters=32, kernel_size=(3, 3), activation=”relu” , name=”layer1″)(img_input)
x = tf.keras.layers.Conv2D(filters=64, kernel_size=(3, 3), activation=”relu”, name=”layer2″)(x)x = tf.keras.layers.MaxPool2D(pool_size=(2, 2))(x)
x = tf.keras.layers.Dropout(0.25)(x)
x = tf.keras.layers.Flatten()(x)
x = tf.keras.layers.Dense(128, activation=”relu”)(x)
x = tf.keras.layers.Dropout(0.5)(x)
x = tf.keras.layers.Dense(10, activation=”softmax”)(x)model = tf.keras.Model(img_input, x)
model.summary()
2.) Create the validation dataset for any particular label that will be given as input to the API’s. We have used mnist dataset with 60,000 training images and 10,000 test images. It has 10 classes with images of numbers ranging from 0–9. Let’s create the tuples for labels 0 and 4 as validation_class_zero and validation_class_four as below.# Here, we choose 5 elements with one hot encoded label “0” == [1, 0, 0, 0, 0, 0, 0, 0, 0, 0]validation_class_zero = (
np.array(
[
el
for el, label in zip(test_images, test_labels)
if np.all(np.argmax(label) == 0)
][0:5]
),None)
# Here, we choose 5 elements with one hot encoded label “4” == [0, 0, 0, 0, 1, 0, 0, 0, 0, 0]validation_class_four = (
np.array(
[
el
for el, label in zip(test_images, test_labels)
if np.all(np.argmax(label) == 4)
][0:5]
),None)
3.) Instantiate callbacks:
Now, let’s instantiate various callbacks, that will be provided to the model. These callbacks will be for numbers 0 as well as 4. In some of them, you can see the name of the layer provided, which can be seen as a convolutional layer in the model above.callbacks = [tf_explain.callbacks.GradCAMCallback(validation_class_zero, class_index=0, layer_name=”layer2″),
tf_explain.callbacks.GradCAMCallback(validation_class_four, class_index=4, layer_name=”layer2″),tf_explain.callbacks.ActivationsVisualizationCallback(validation_class_zero, layers_name=[“layer2”]),
tf_explain.callbacks.ActivationsVisualizationCallback(validation_class_four, layers_name=[“layer2”]),tf_explain.callbacks.SmoothGradCallback(validation_class_zero, class_index=0, num_samples=15, noise=1.0),
tf_explain.callbacks.SmoothGradCallback(validation_class_four, class_index=4, num_samples=15, noise=1.0),tf_explain.callbacks.IntegratedGradientsCallback(validation_class_zero, class_index=0, n_steps=10),
tf_explain.callbacks.IntegratedGradientsCallback(validation_class_four, class_index=4, n_steps=10),tf_explain.callbacks.VanillaGradientsCallback(validation_class_zero, class_index=0),
tf_explain.callbacks.VanillaGradientsCallback(validation_class_four, class_index=4),tf_explain.callbacks.GradientsInputsCallback(validation_class_zero, class_index=0),
tf_explain.callbacks.GradientsInputsCallback(validation_class_four, class_index=4)
]
4.) Loading tensorboard:%reload_ext tensorboard
%tensorboard — logdir logs
5.) Training of the model:opt1 = tf.keras.optimizers.Adam(learning_rate=0.001)model.compile(optimizer=opt1, loss=”categorical_crossentropy”, metrics=[“accuracy”])
model.fit(train_images, train_labels, epochs=20, batch_size=32, callbacks=callbacks)
6.) Results:
Results that I obtained were loss: 0.4919 — accuracy: 0.8458. These were obtained after just 4–5 epochs. I tried with various optimizers and the maximum time were taken by SGD and AdaGrad for about 15 epochs.
7.) Tensorboard results:
Activation Visualisations of images numbered 0 and 4:

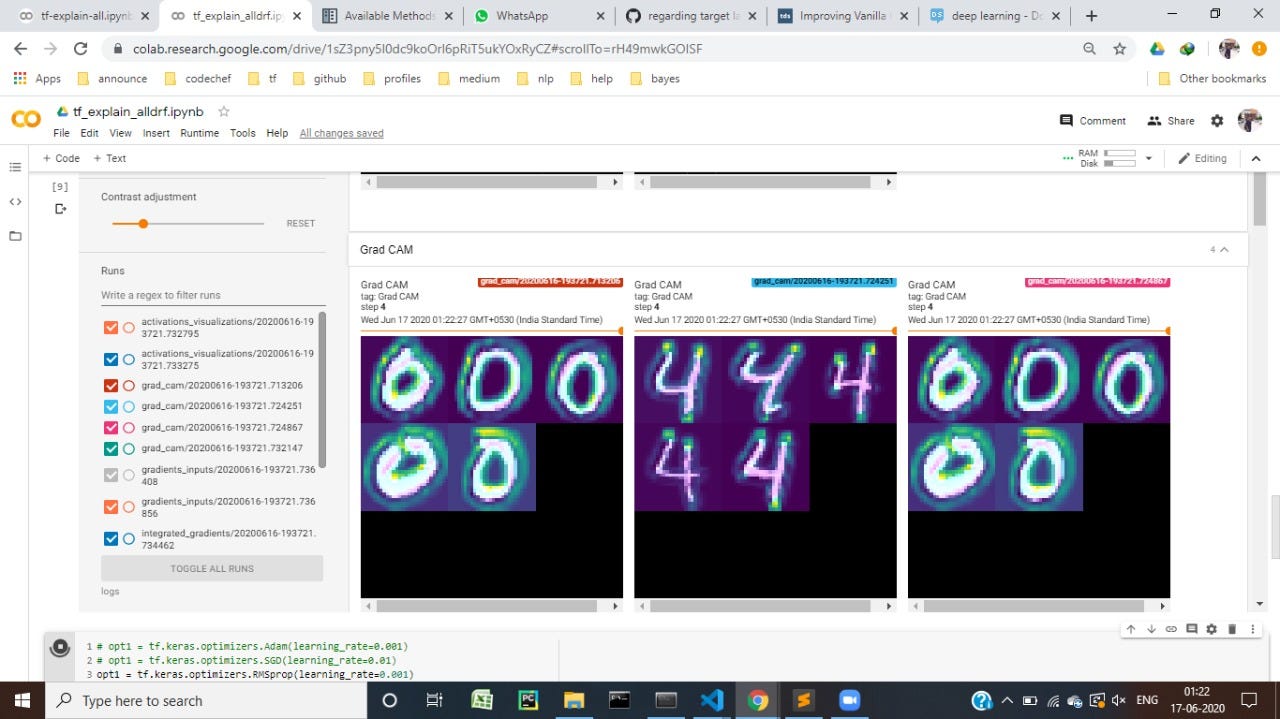
GradCAM implementation of images numbered 0 and 4:

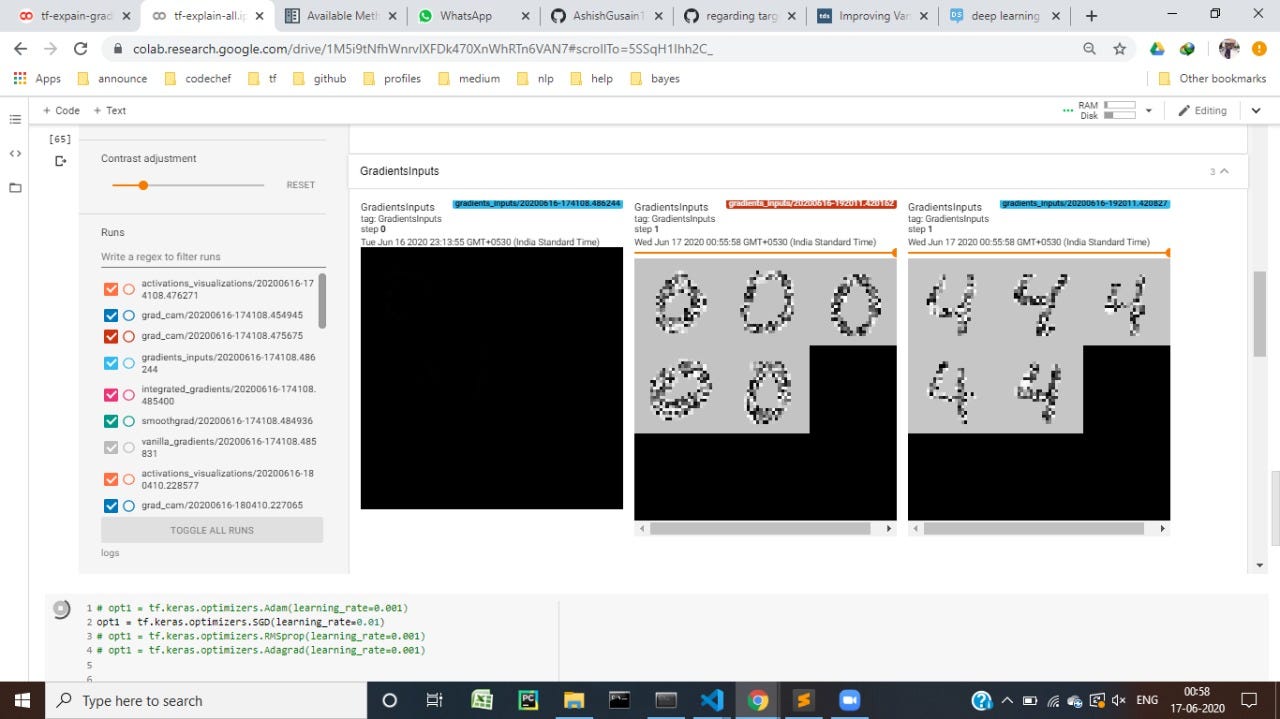
Gradient Inputs of images numbered 0 and 4:

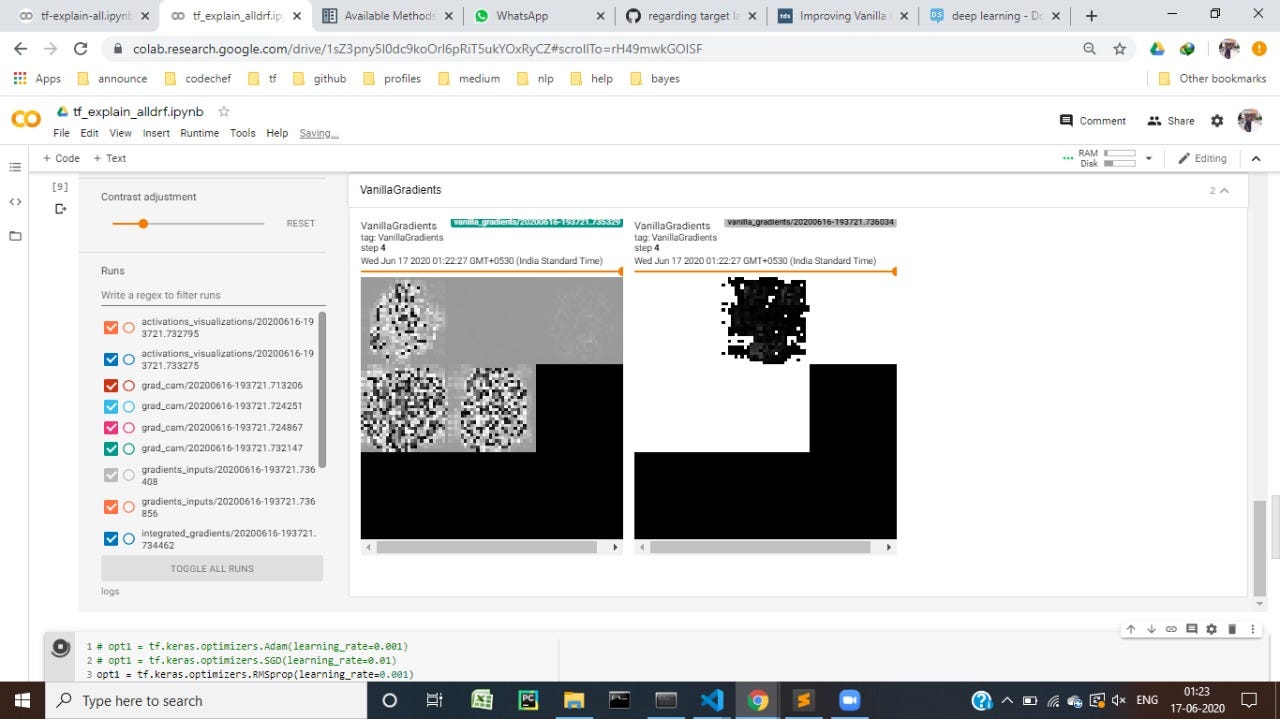
Vanilla Gradients of images numbered 0 and 4:

Integrate Gradients of images numbered 0 and 4:

Smooth Gradients of images numbered 0 and 4:

This is all from my side. You can reach me via:
Email : ashishgusain12345@gmail.com
Github : https://github.com/AshishGusain17
LinkedIn : https://www.linkedin.com/in/ashish-gusain-257b841a2/


 ufabet
มีเกมให้เลือกเล่นมากมาย: เกมเดิมพันหลากหลาย ครบทุกค่ายดัง


